
A Zero-Cost Research Stack
I am a prolific Markdown user, and when I discovered Obsidian, it quickly became my note-taking app of choice. As I near the beginning of the end for my MSc in Computer Science, the Research Proposal, I’ve been reflecting on whether Obsidian is a more fitting tool for structuring notes than my previous favourite, Google Docs.
Google Docs vs Obsidian
Google Docs has some key benefits, but the main draw for me is its ability to sync documents to my Google Drive so I can easily edit and view them from anywhere. Obsidian does offer a cloud-storage option called Obsidian Sync, and whilst this appears to offer good value, I, like many developers, enjoy the challenge of achieving the same outcome from scratch (and for free!).
Based on that, after some R&D, here’s the tech stack I’ve settled on:
- Obsidian for generating Markdown pages.
- Quartz for converting Markdown files to static HTML.
- A private GitHub repository for hosting Quartz and the Markdown content.
- A Cloudflare application to run Quartz and publish the output to a private, password-protected website.
This post will outline the process in case you would like to replicate it yourself! Most of the instructions assume a Linux install, as Ubuntu/ChromeOS are my primary operating systems, but this will work for Windows too (with a few modifications).
What do I need Obsidian to do?
My workflow as a student revolves around my working on one of three productivity devices: a Chromebook, an Ubuntu laptop, and a Windows desktop. I also like to browse notes on my Android phone. As such, the first requirements are:
- I can run Obsidian on all three devices: Windows, ChromeOS, and Ubuntu.
- I can automatically pull down/sync notes from a central, remote repository on opening the app.
- I can edit the notes locally and push them to the cloud when done, either manually or automatically.
- I can store and view notes securely, without them being publicly accessible.
- All tools are free.
NoteThis tutorial assumes you already have the following software installed on your device:
- Git
- Node Version Manager
- Flatpak (Ubuntu and ChromeOS)
- Crostini (Chromebooks only)
You will also need a GitHub account.
Running Obsidian…
…on Windows
Download and run the executable from their website. Easy!
…on Ubuntu
Obsidian offers several methods for installing its app on Ubuntu, but my preferred method is flatpak. Run this :
flatpak install flathub md.obsidian.ObsidianTo run Obsidian, either use flatpak run md.obsidian.Obsidian, or open it from your App Launcher.
…on ChromeOS
Since ChromeOS supports Linux (Crostini), you can also use flatpak here. Enable Linux in your Chromebook settings, then install it with:
sudo apt update && sudo apt install flatpak
sudo flatpak remote-add --if-not-exists flathub https://flathub.org/repo/flathub.flatpakrepo
sudo flatpak install flathub md.obsidian.Obsidian
You can then find and launch Obsidian in your app menu. Check the Flatpak site for a more detailed example if you run into problems.
Cloning Quartz
The Quartz project is designed to be cloned and modified. First, create a directory to house the repo and navigate into it. For example:
mkdir ~/notes
cd ~/notes
Next, clone and build Quartz by running:
git clone https://github.com/jackyzha0/quartz.git
cd quartz
npm install
npx quartz create
Open Obsidian, select Open Folder as vault, then open the {quartz_project}/content directory.
View your wiki locally
You can see how the site looks before pushing to GitHub by running:
npx quartz build --serveOpen http://localhost:8080 in your browser to preview the site.
Using GitHub as a repository
Create a new private, empty repository on GitHub, then copy the “clone” URL. In your terminal, navigate to the directory containing your Quartz project, and set the origin remote to point to your new repository.
git remote set-url origin git@github.com:YOUR_USERNAME/YOUR_REPO_NAME.git
git add .
git commit -m "Initial Quartz setup"
git push -u origin v4InfoQuartz uses the
v4branch by default instead ofmain
After that, push the project to your repository:
git add .
git commit -m "update notes"
git push origin v4
Clone this repository on any devices running Obsidian that you intend to use for creating and editing notes. Before continuing, verify that your device is correctly authenticated to your repository by running git push --dry-run to ensure the Obsidian Git plugin won’t fail silently in the background.
Configure Obsidian to automatically sync changes
In Obsidian, go to Settings → Community Plugins, search for Git (this one) and install it. Once done, open the plugin’s configuration page and turn on Pull on startup.
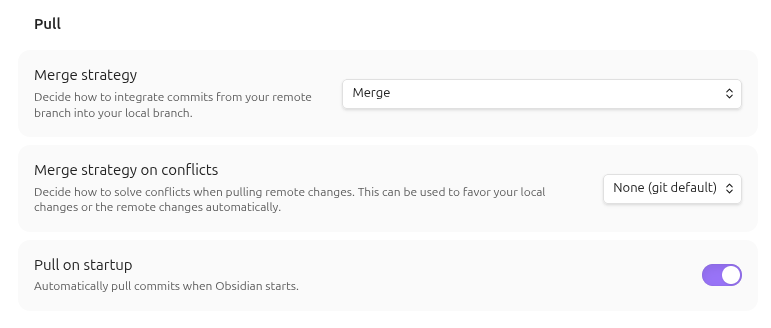 This will ensure that opening Obsidian will pull in your latest notes before you start work.
You can also configure automatic pushes if you like, but I personally prefer to manually push when done. If you are pushing manually, then use git to push your notes whenever you feel it is appropriate:
git add .
git commit -m "update notes"
git push origin v4
Build and deploy your wiki with Cloudflare
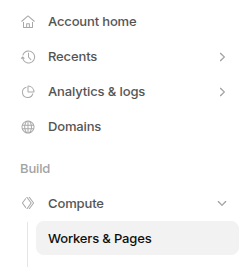
Create a Cloudflare account on Cloudflare, then, from your home page, open Compute → Workers and Pages from the left-hand sidebar.
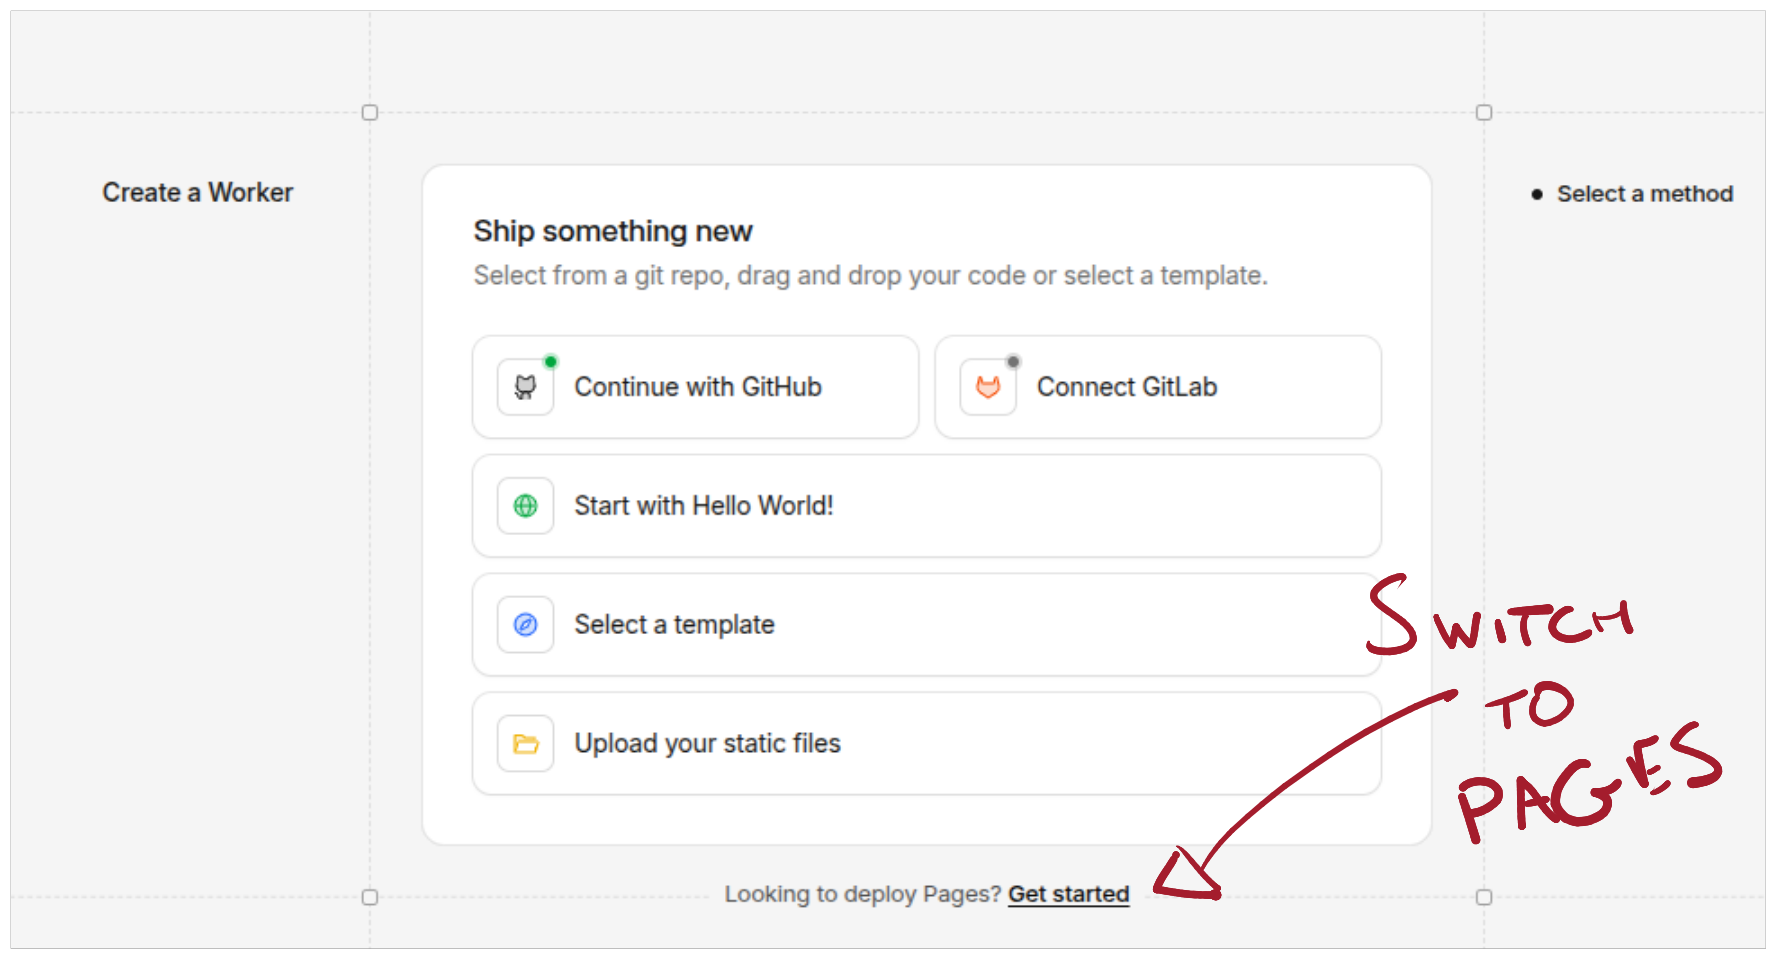
Select Create Application, then at the bottom of the available options, click Looking to deploy Pages? Get started.
From here:
-
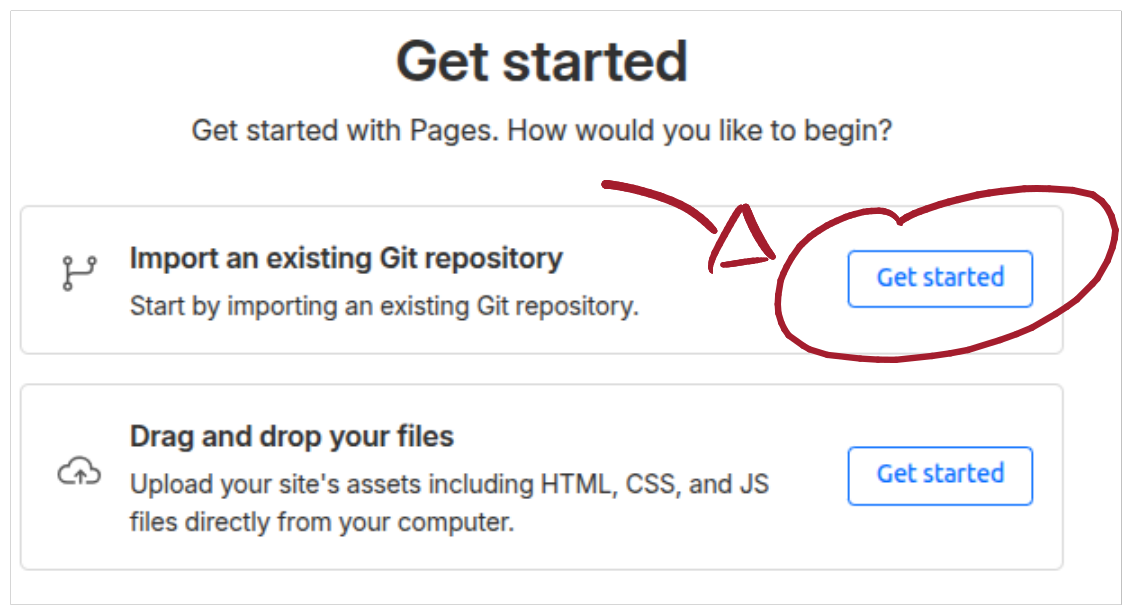
Choose Import an existing Git repository (Get Started).
-
Link GitHub (if you haven’t already), select your private repository from the drop-down menu, and select Begin setup to proceed.
-
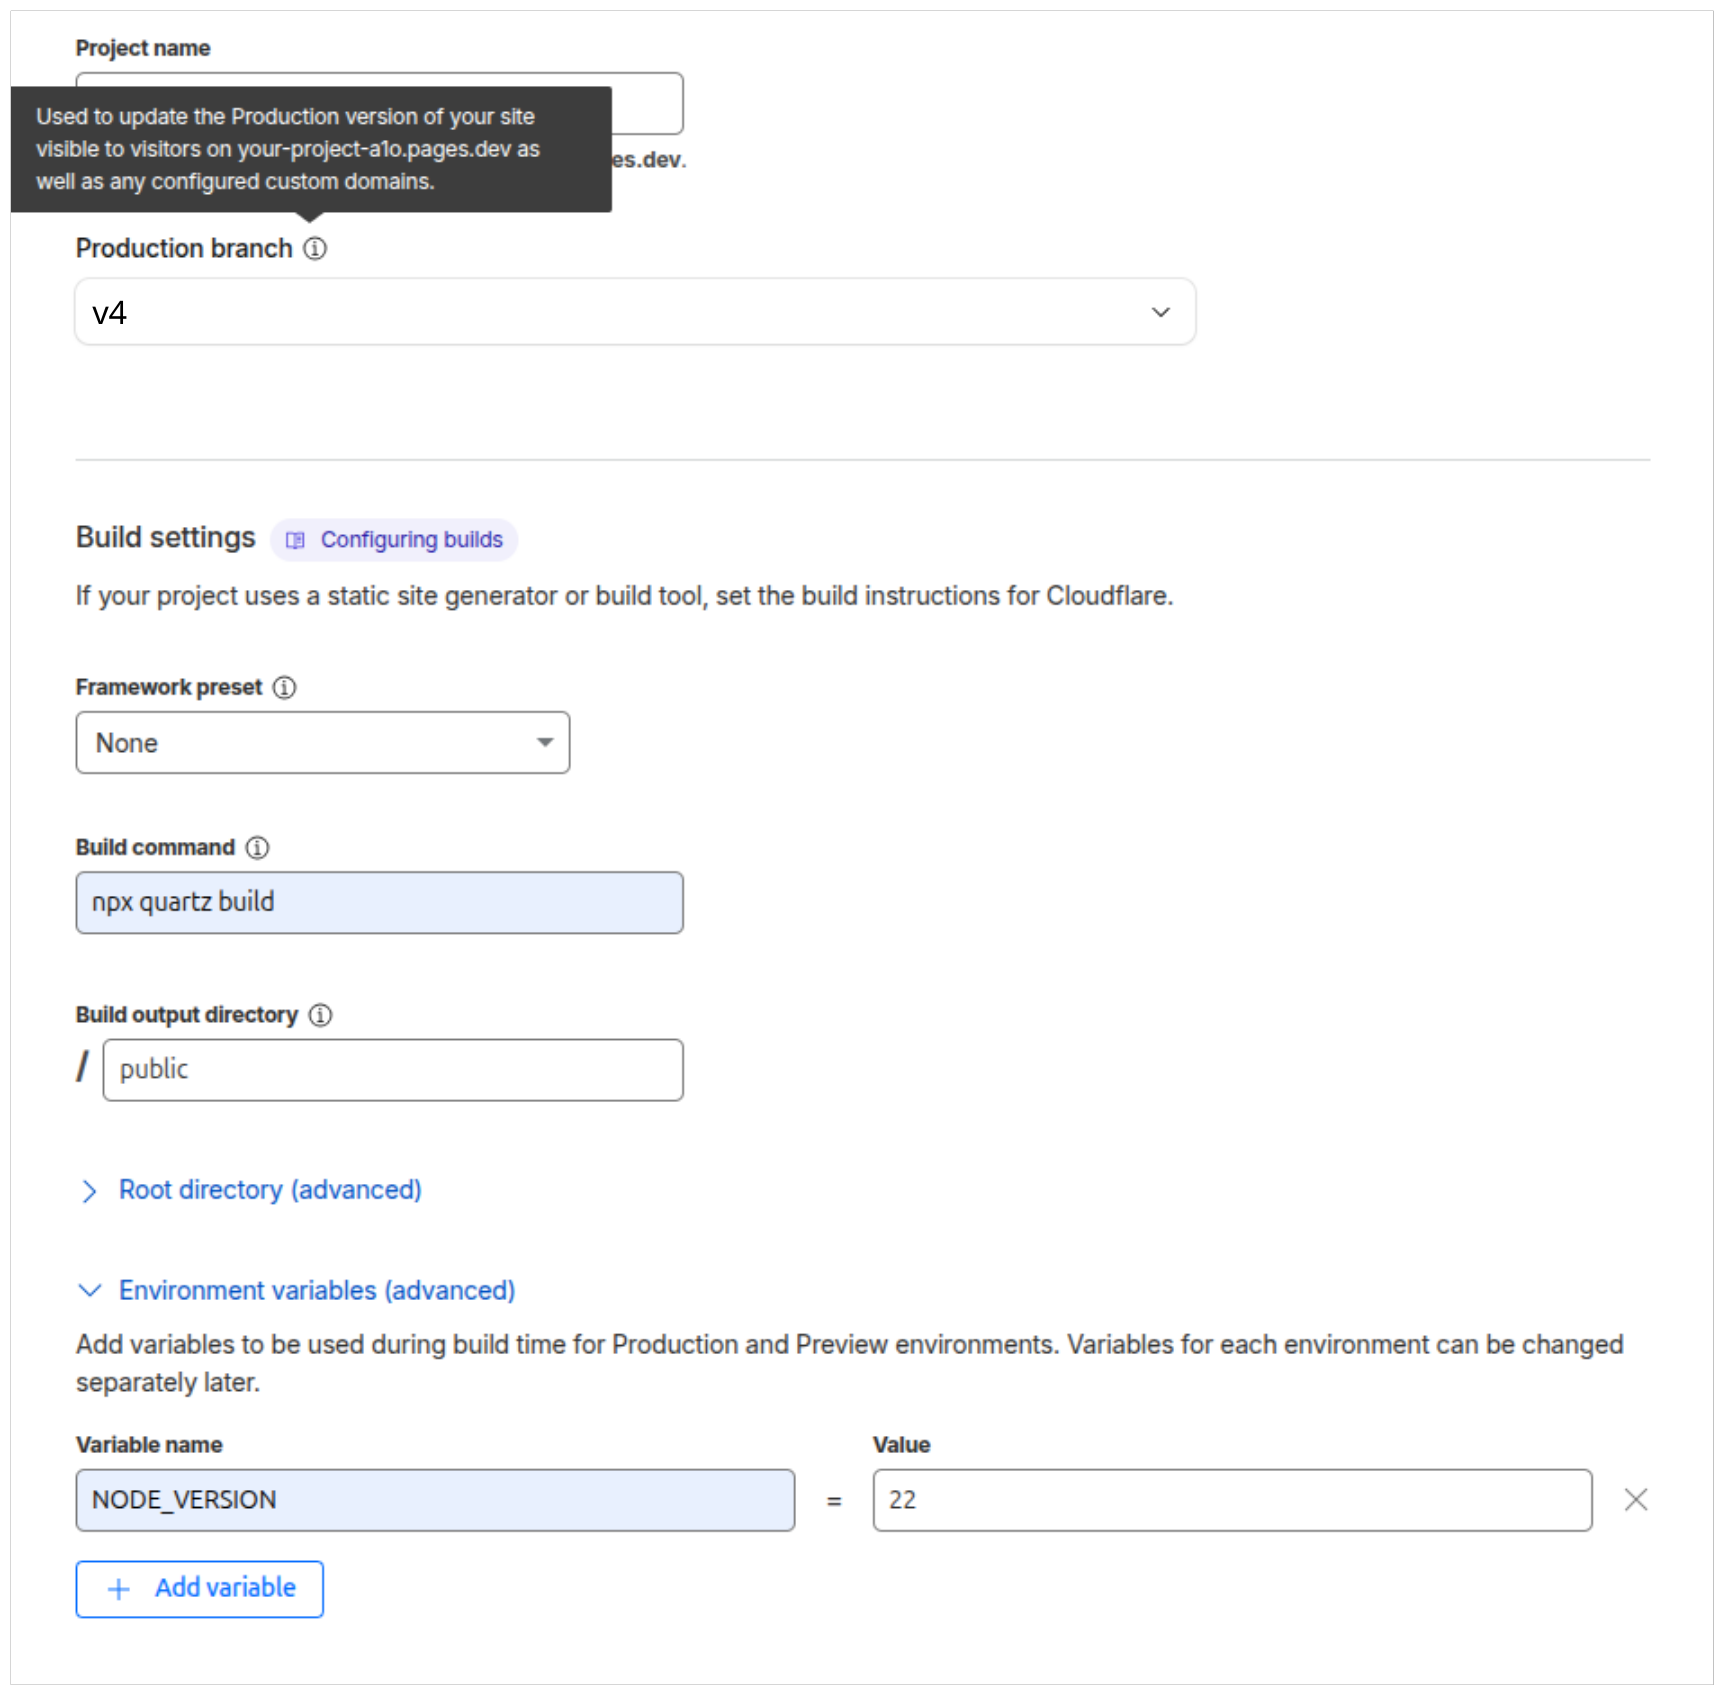
Give your project a name (i.e., ResearchNotes), and set your production branch to
v4. Under Build Settings, set the following:
- Framework Presets =
None - Build Command =
npx quartz build - Build Output Directory =
public - Root Directory =
/
- Finally, before you press Save and Deploy, expand the Environment Variables section and add the following variable:
- Variable Name =
NODE_VERSION - Value =
22
Finally, click Save and Deploy. Your CI/CD pipeline will run and, eventually, publish a success message and a link to your live site. Save this link for the next step.
Restricting access
A major advantage of using Cloudflare to host your live site is that it’s possible to add password restrictions for free. I used the ZeroTrust feature for this, which requires defining an access policy and application.
NoteWhen selecting ZeroTrust for the first time, Cloudflare may prompt you to select a plan and enter payment information. You should choose the Free plan, and even though this is a $0-a-month subscription, you will still be prompted to enter a payment method. This will not be charged, but is nonetheless required to continue.
If you are squeamish about entering your card details, then I would recommend using a platform like Revolut to create a virtual credit card with a low monthly spend limit.
Specify a policy
The first step is to create a policy that describes who is allowed to access your site. I restricted site access to my personal email, so only people with access to my inbox can view my notes. To add this yourself:
- From your Cloudflare Dashboard home page, select ZeroTrust from the left-hand sidebar.
- Open Access Controls → Policies and Add a policy.
- Set the Policy name to Emails.
- Set the Action to Allow.
- Set the Session duration to whatever you like.
- Under the Add Rules section:
- In the Selector, choose Emails.
- For the Value, type in your email address. Press the Enter key to commit it, then press Save at the bottom of the page.
Define your application
The final stage is to create an application that uses the policy you previously defined.
- Open Access Controls→ Applications and Add an application.
- Select Self-hosted.
- On the Add an application page:
- Enter a name under the Application name field. This can be anything: I called mine “The Research Wiki”.
- Press Add public hostname, and enter the link to your published, live site.
- Under Access policies, click Select existing policies and choose your Emails policy from the previous step.
- Click through the rest of the setup wizard.
And the result?
I now have a secure, high-performance research wiki that I can edit on my Ubuntu laptop, Chromebook and Windows desktop. It automatically syncs when I open Obsidian, and I can push changes whenever I like. When I’m on the go, I can read my notes on my phone via the private URL, knowing they are safely tucked behind Cloudflare’s Zero Trust bouncer.
Credits: Hero image by Jr Kopa.